
Your First Quilt: A Beginner’s Roadmap
Walking into a fabric store as a brand-new quilter can feel like stepping into a foreign country. Walls of cotton prints, rulers in a dozen shapes, and patterns written in what looks like code — it’s a lot. We’ve been there, and we promise it gets easier. This roadmap walks you through your first quilt from start to finish, with a Canadian slant: where to shop, who to follow, and how to finish something you’ll actually be proud of.
Gather Your Quilting Toolkit: What You Actually Need
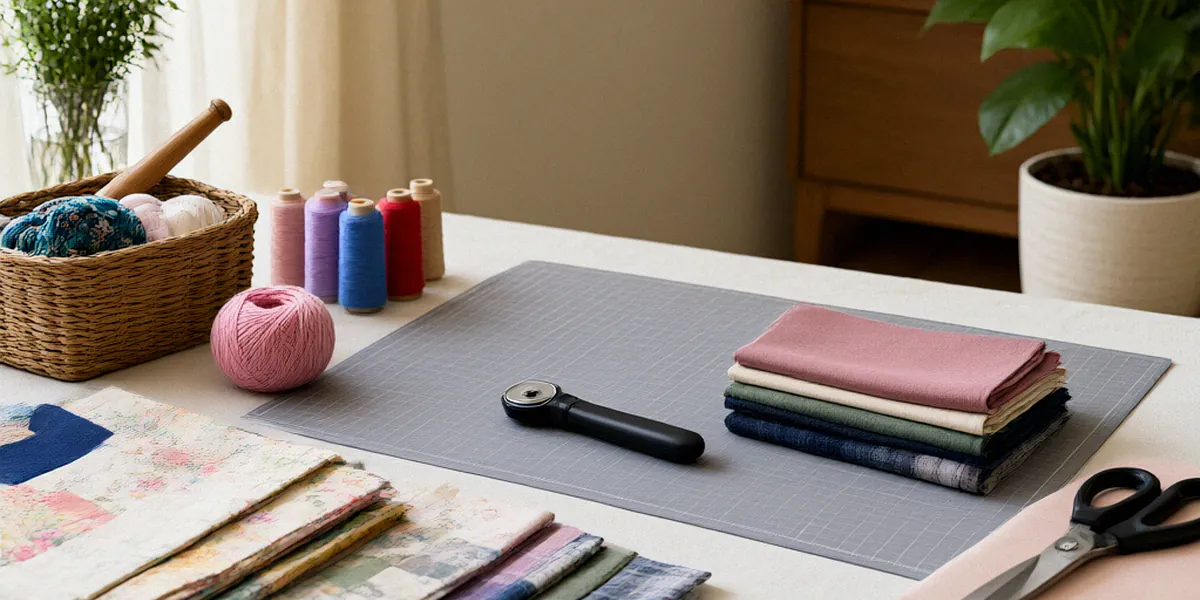
You don’t need a studio full of gadgets to make a quilt. You need a few core tools, a working sewing machine, and the patience to learn a couple of skills well. Canadian quilters are lucky here — Fabricland, a Canadian fabric chain with locations across the country, is a solid starting point for basics, and independent shops like Hamels Fabrics in Chilliwack, BC, carry the higher-end tools and quilting cotton you’ll graduate to.
The Non-Negotiables: Rotary Cutter, Ruler, and Mat
Scissors will not cut it for quilting (literally). You need a rotary cutter, a self-healing cutting mat, and an acrylic ruler — typically 6″ x 24″ for strip cutting. Buy a 45mm rotary cutter to start; it’s the most versatile size. Replace your blade the moment it starts skipping, because a dull blade is the number one cause of crooked cuts and fabric shifting.
Sewing Machine Basics for Quilters
Any machine that sews a straight stitch reliably will quilt. You don’t need a $3,000 machine. What matters is that your machine has a 1/4-inch presser foot (or a way to mark one), decent tension control, and the ability to drop its feed dogs later for free-motion quilting. If you’re shopping used, bring a scrap of quilting cotton and test a seam before you buy.
Nice-to-Haves You Can Add Later
- Walking foot — essential for straight-line quilting, but you can borrow one at first
- Darning or free-motion quilting foot
- Design wall (a flannel-backed tablecloth on the wall works)
- Seam ripper you actually like using
- Clover Wonder Clips instead of pins for binding
Choosing Fabric for Your First Quilt: Quality Over Quantity
Quilt shop quality cotton behaves better than bargain-bin fabric: it’s tighter woven, holds a press, and doesn’t fray into oblivion. For a first quilt, buy a coordinated bundle — a charm pack or fat quarter bundle — rather than trying to match prints yourself. In Canada, online shops like The Quilting Bee and Mad About Patchwork ship coast to coast and carry Canadian-friendly brands.
Understanding Fabric Grain and Why It Matters
Fabric has three grains: lengthwise (parallel to the selvedge), crosswise (perpendicular), and bias (diagonal). Crosswise and lengthwise grain stretch very little, which is why we cut strips along them. Bias stretches like crazy — beautiful for curves, terrible for beginners. If a strip won’t stay straight, check whether you accidentally cut on the bias.
Pre-Washing and Colour Catchers: A Canadian Quilter’s Guide
Pre-washing removes sizing and shrinks fabric before it goes into your quilt. Use a Colour Catcher sheet in the wash to catch loose dye, especially with deep reds and blues. Tumble dry low or hang to dry, then press before cutting. If you skip pre-washing, your finished quilt may shrink unevenly the first time it’s washed.
Building a Starter Stash Without Breaking the Bank
Start with a neutral background (white, cream, or low-volume print) plus a dozen fat quarters in colours you love. Buy when your local shop has a sale, and don’t hoard — fabric you never cut isn’t a stash, it’s decoration.
Pick a Beginner-Friendly Quilt Pattern (and Avoid the Traps)
Your first pattern should be squares, strips, or simple half-square triangles. Avoid curves, Y-seams, and anything labelled “intermediate” no matter how pretty. Canadian designers like Cheryl Arkison are known for beginner-friendly patterns that teach real skills without the frustration.
Our Top 3 Free Beginner Quilt Patterns
- Charm pack squares — sew 5″ squares into rows, done. Perfect first quilt.
- Jelly roll race — strips sewn end to end, then cut and re-sewn. Fast and forgiving.
- Simple half-square triangle quilt — teaches you HSTs, a skill you’ll use forever.
Reading a Quilt Pattern: What Those Diagrams Really Mean
Pattern diagrams show you the finished block, not the sewing order. Read the written instructions first, then look at the diagram to confirm. “WOF” means width of fabric, “RST” means right sides together, and “press to the dark side” is a real instruction, not a Star Wars joke.
Scaling Your Quilt: Lap, Throw, or Bed Size?
Lap quilts (around 50″ x 65″) are the sweet spot for a first project — big enough to be useful, small enough to quilt on a domestic machine. Throw quilts run 60″ x 72″. Bed quilts are a serious commitment; save those for quilt number three.
Cut, Piece, and Press: The Core Quilting Skills
These three skills — cutting, piecing, pressing — are 90% of quilting. Get them right and everything else falls into place. The Toronto Modern Quilt Guild offers resources and meetups for Canadian quilters who want hands-on help with these fundamentals.
How to Cut Fabric Without Losing Your Mind
Press your fabric flat before cutting. Line up the ruler’s edge with the fabric’s fold or selvedge, not with what “looks straight.” Keep your rotary cutter vertical and your hand on the ruler, not the blade. Cut away from your body, always.
Mastering the Scant 1/4-Inch Seam
A “scant” 1/4-inch seam is just a thread or two shy of a full quarter inch. This matters because thread and fold take up space. Test yours by sewing three 2.5″ strips together, pressing, and measuring — the unit should be exactly 6.5″ wide. If it’s off, adjust your needle position.
Pressing vs. Ironing: Why It Changes Everything
Ironing slides the iron back and forth; pressing lifts and sets. In quilting, you press. Set the seam first with the iron down, then open the fabric and press the seam to one side. Never drag the iron across a seam — you’ll stretch it out of shape.
Quilting Your Quilt: Free-Motion Basics and Simple Alternatives
Once your quilt top is done, you need to quilt it — the stitching that holds the layers together. You have options: free-motion quilting on your domestic machine, straight lines with a walking foot, or sending it out to a longarmer. Canadian organizations like Quilts of Valour work with longarm quilters across the country, so the network exists if you’d rather not do it yourself.
Setting Up Your Machine for Free-Motion Quilting
Attach a darning or free-motion foot, drop the feed dogs, and lower your tension slightly. Use a fresh needle (size 90/14 quilting needle works well). Practice on a scrap sandwich first — you’re aiming for even stitch length, not perfection.
Straight-Line Quilting with a Walking Foot: The Safe Start
A walking foot feeds all three layers evenly, which prevents puckers. Stitch parallel lines across your quilt, spacing them 2–3 inches apart. It’s not fancy, but it’s reliable and looks intentional.
When to Hire a Longarmer (and How to Find One in Canada)
If your quilt is bigger than a throw, or you’re short on time, hire a longarmer. Expect to pay by the square inch, and ask about thread and batting options. Search local quilt guilds, Facebook quilting groups, or ask at your nearest quilt shop for recommendations.
Finishing Strong: Binding and Labelling Your First Quilt
The finish is what makes a quilt feel finished. Binding takes an hour or two; labelling takes five minutes and lasts a lifetime.
Double-Fold Binding: Our Go-To Method
Cut 2.5″ strips on the crosswise grain, sew them end-to-end into one long strip, press in half, and sew to the front of the quilt with a 1/4″ seam. Wrap to the back and hand-stitch or machine-finish. Machine binding is faster; hand binding looks cleaner. Try both.
Adding a Label: Sign Your Work Like a Pro
Write your name, the date, and where you made it — “Made in Canada” is a point of pride. Use a permanent fabric pen or print on printable fabric sheets. Sew the label to the back corner before binding so it’s secured by the binding itself.
Washing and Caring for Your Finished Quilt
Wash on gentle with a colour catcher and a mild detergent. Tumble dry low or air dry flat. Store folded, out of direct sunlight, and refold along different lines every few months to avoid permanent creases.
FAQ
How much fabric do I need for my first quilt?
For a lap quilt around 50″ x 65″, plan on about 3.5 yards of background fabric, 1.5 yards of assorted prints, 3.5 yards for backing, and 0.5 yards for binding. Batting is sold by the package or the metre.
Can I quilt my first quilt on a regular sewing machine?
Absolutely. Most domestic machines handle a lap or throw quilt with a walking foot or free-motion foot. Roll or bunch the quilt to fit through the throat space, and take breaks — wrestling a quilt is a workout.
Where can I buy quilting fabric in Canada?
Fabricland has locations across the country for basics. For quilt shop quality cotton, try Hamels Fabrics in Chilliwack, BC, or online Canadian shops like The Quilting Bee and Mad About Patchwork.
Do I really need to pre-wash my fabric?
Yes, especially for your first quilt. Pre-washing prevents shrinkage and dye bleeding later. If you’re using pre-cuts like charm packs, skip the wash — they’ll fray — and use a colour catcher in the finished quilt’s first wash instead.
How do I find other quilters near me in Canada?
Look for your local quilt guild — the Toronto Modern Quilt Guild is one example, and most cities have at least one traditional guild. Online, Canadian quilting Facebook groups and Instagram hashtags like #canadianquilters are active and welcoming.
Your first quilt isn’t going to be perfect, and that’s the point. Every wobble in your quilting lines and every slightly-off seam is a lesson your hands will remember. Join a guild, follow a few Canadian designers, ask questions in online communities, and then start quilt number two — because that’s when it really clicks.